Today was canning center day! I was so excited I woke up at 4am to be sure not to miss our 6am appointment even though the canning center is literally around the corner from where I live.
I have know about local canning centers for years, but for some reason always thought they only did number 10 cans and you had to be part of the local LDS Church to use them. So when my neighbor asked me if I would help her process her chicken and beans I was all over it.
Processing Beans at the Canning Center
The method for processing beans starts with buying your beans at the best price. We are having a case lot sale right now here locally. Case lot sales happen in the spring and fall around here. You can buy lots of canned items and staples in bulk. Generally it makes me laugh when I visit people who buy flour in 5lb bags. That’s like one loaf of bread! My neighbor bought a couple bags of red beans which she took over to the canning center last night to soak. The people who run the center turned on the heat early this morning. So by the time we got there to can them they were tender.
Preparing The Chicken For Canning
She bought her chicken for $50 ($1.38 a pound). These chicken breasts she then cut up into smaller chunks and put them in a couple plastic garbage bags. Then put the garbage bags in a cooler with ice over night. The cooler makes it easier to transport and keeps chicken juice from getting all over the place.
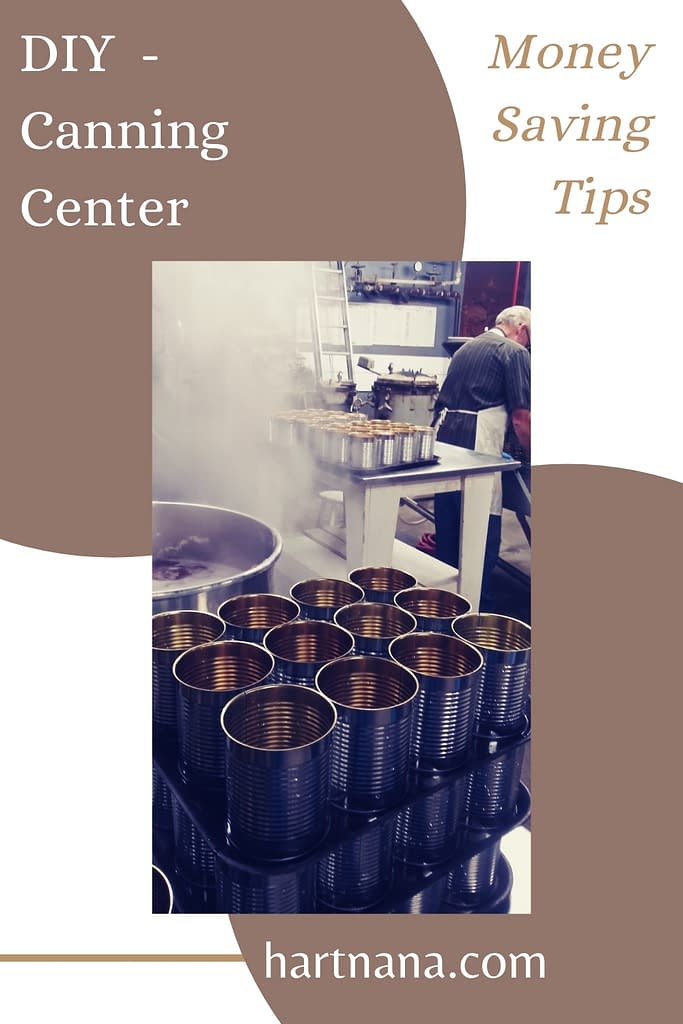
The Canning Center Step by Step
Once we arrived we checked in and got our number. Then we tried to guess how many of the two types of cans we were going to need. We used the smaller cans (#300 15oz) for the chicken and larger cans for the beans (401 28oz). We then collected some cafeteria trays and went and collected our cans off the pallet.
The next step was to write on the bottom of the can, the item, the date and our number. You need a sharpie pen for this step.
Then we got a basin of hot water and rinsed each can, putting them open end up on the trays.
Once that is completed we then filled the #300 cans with our chicken. Plastic gloves are a must. We filled the cans to 1/4 inch from the top and then took them over to the cooker. At this point they get commingle with other cans of chicken being canned. Water is added to cover the meat. Once the chicken is done cooking in the cans they get lids added.
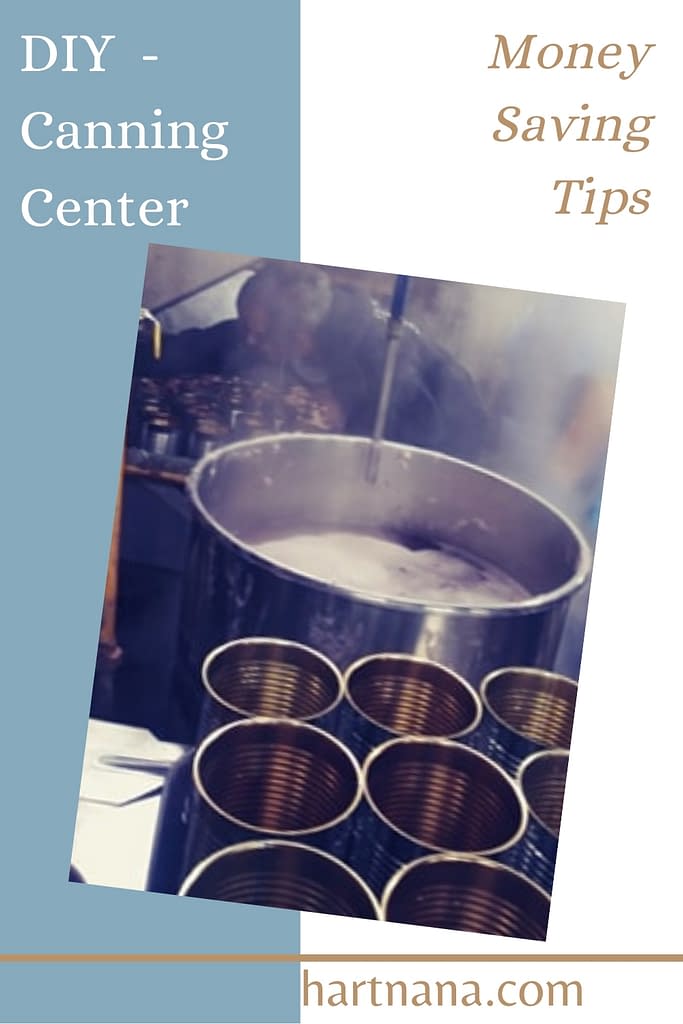
On To The Beans Again
The beans once they are tender (she taste tested them) we drained a bit so that we could fish them out of the caldron. We used a small sauce pan for this effort and put the beans in the 401 cans, then added juice to get to the 1/4 inch fro the top mark.
We then moved them over to the lid application table and lids were applied.
Cleaning Up
We then needed to clean out the caldron and utensils we used. Supplies were provided to make this an easy process, but a spare kitchen rag or two should be part of your canning center kit. We used a five gallon bucket which included an apron – I wear overalls most of the time so didn’t need one – plastic gloves, sharpie pens, paper towels & nail polish remover.
You need the nail polish remover and paper towels to clean off the sharpie pen labeling of the cans you didn’t end up using. Once you get them cleaned off you return them to the pallet.
What Can You Can?
As far as I can tell you can can just about anything! From chili and soups to all kinds of meat, beans, potatoes & any veggies. The canning center people are a wealth of knowledge and can help guide you on what steps to take to prepare your food for canning. They also have a juicer! So bring those apples & tomatoes!
Tips For Cost Saving
Canning at the canning center isn’t cheap but there are a few things you can do to make it most cost effective. Buy your products on sale. We are in Idaho – potato country! We can get huge bags of potatoes for cheap this time of year. Potatoes can exceptionally well in my opinion. I’ve often canned them in jars, however, I did see lots of people canning them at the center.
Canning your harvest is another cost effective way to use the canning center. Grow a boat load of corn? Can it!
Things I learned For Next Time
Wear water resistant shoes and pants that don’t drag on the ground. The floor is wet almost everywhere. If you are canning beans try not to let too much of the water drain off before putting the beans in the can. We had to add more water and let it get up to temperature again.